|
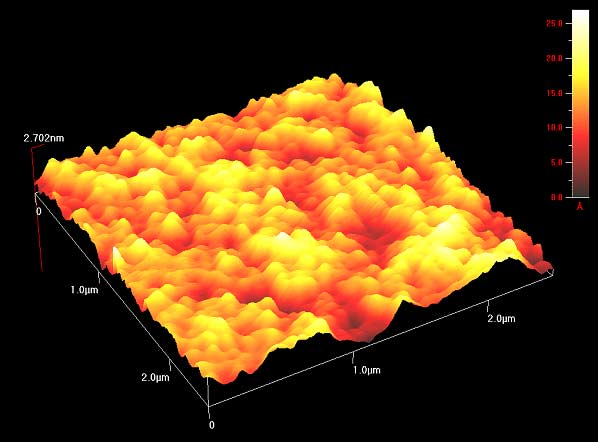
This week we poked polymers! Well, tried to. Our goal this week was to create a detailed three-dimensional image of the topography of the different polymers so that we could see how the surface changed based on the solvent used to create the polymer and the method of creation used (spin coat, melt press, or drop cast). The topography is important, as a rougher surface means increased adhesion to surrounding cells and other objects. In order to do this, we made our way back to the exotic lab to use an Atomic-force microscope (AFM).
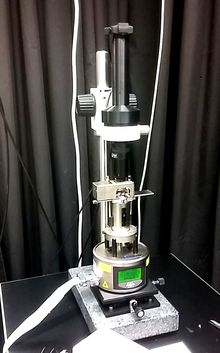
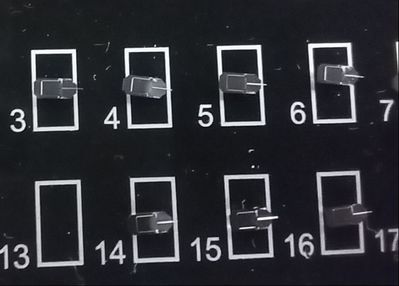
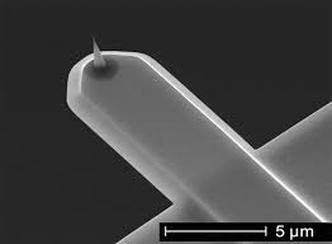
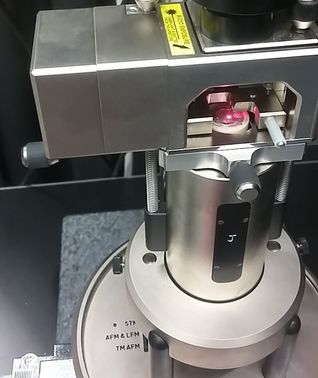
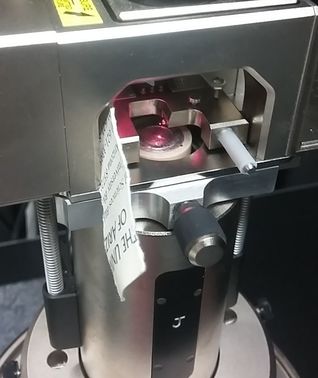
The way this microscope works can be a little bit difficult to understand (so bear with me). In standard contact mode, the tiny tip on the underside of a flexible cantilever (see images of cantilever below) scans across a surface (with changes in the height of the surface causing changes in the bending of the cantilever). Because the tip of the cantilever is touching the surface, strong repulsive forces also cause the cantilever to bend as the tip passes over the various features of the surface. While it scans, a laser is pointed at the top of the cantilever, and any bending of the cantilever will causes changes of the position of the reflected beam. A detector tracks and records the changes in the reflected beam, which allows an image of the topography of the surface to be produced. 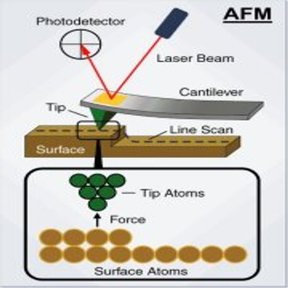 This type of microscopy has its downsides though. The tip on the underside of the cantilever is very small and sharp, so it could damage the polymer as it is scanning or get stuck. The solution? Non-contact AFM. Here the cantilever oscillates just above the surface as it scans, basically quickly poking the surface without actually touching it. As the tip approaches the surface, the forces between the tip and object cause the amplitude of the cantilever's oscillation to decrease. A feedback loop corrects for changes in amplitude and thereby keeps the cantilever from running into the surface, even with the constantly changing height. Here, the reflected laser beam as well as the changes in the oscillation amplitude are what create an image of the surface topography. As confusing as this microscope can be, it is amazing in that it is incredibly detailed and can measure by fractions of a nanometer. That's tiny. Molecule size tiny. 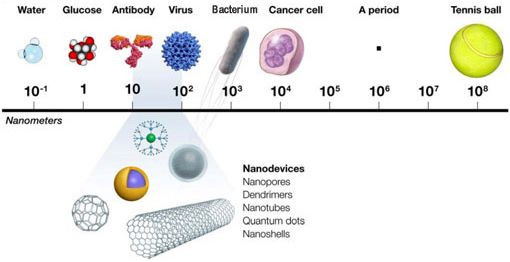 A nanometer comparison.... Using this microscope meant setting up the microscope first, and my limited (well, nonexistant) knowledge of how to do so meant this included a lot of watching and learning. The first step was to equip the microscope with a probe. These are the little devices that would be doing the polymer "poking". They were very very small and as we learned, also very easy to lose (don't worry, we found #13 eventually).
Setting it into the machine correctly was the rather tricky part. To do this correctly, we had to place it on the mount of the microscope that holds the probe, adjusting it until a light is illuminating only the needle (cantilever) end of the probe.
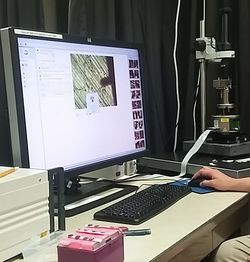
This led us to another day in the exotic lab, starting fresh with high hopes for better results. Luckily, we succeeded. 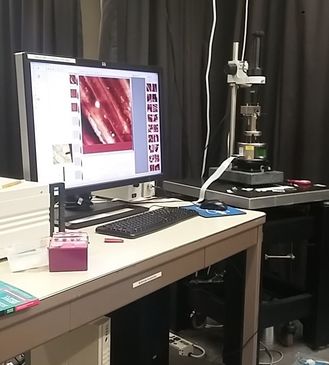 Scanning the topography of one of the polymers! This day was exciting as we finally got some great images of the polymer itself. While I don't have any pictures of the final 3-D product, imagine the rolling hills of Austin, TX. That's what some of them looked like. Our luck didn't last though, as after a few polymers the machine stopped scanning. There seems to be room for improvement. All in all, a successful week. Thoughts after this week:
Until next week! Maren
0 Comments
Leave a Reply. |
AuthorHello! I'm Maren, a high school senior and aspiring BME student. My goal is to share my experiences as I dive into the field of Biomedical Engineering. If you have any questions or remarks, please don't hesitate to leave a comment! Archives
April 2017
Categories |
 RSS Feed
